Sama seperti sistem operasi yang
lain, Windows 8 pun mendukung fitur multi OS, di mana beberapa sistem operasi
diinstal bersama-sama. Baik berdampingan dengan sesama sistem operasi Windows
maupun linux. Dengan segala fitur barunya, rasanya sayang jika kita tidak mencoba
Windows 8 secara langsung.
Baik, kali ini kita akan membuat sebuah
multi booting antara Windows 7 dan Windows 8. Cara yang digunakan di sini
adalah menggunakan VHD (Virtual Hardisk Drive), sebuah fitur di Windows yang
memungkinkan kita membuat hardisk secara virtual tanpa membuat partisi secara
nyata. Dengan VHD ini, kita bisa membuat partisi baru pada sistem operasi Windows.
Asumsinya sistem operasi Windows 7 sudah terinstal di komputer atau notebook.
Perlengkapan awal adalah sebagai berikut :
- Sistem Operasi Windows 7 sudah
terinstall
- File image (.iso) Windows 8 (Consumer
Preview atau Release Preview)
- Script PowerShell yang bisa didownload
di http://archive.msdn.microsoft.com/InstallWindowsImage/Release/ProjectReleases.aspx?ReleaseId=2662
(tersedia juga di file zip)
- Software image loader (Daemon Tools,
Virtual Clone atau software sejenis)
- Free space hardisk
20 GB (standar minimal install Windows 8)
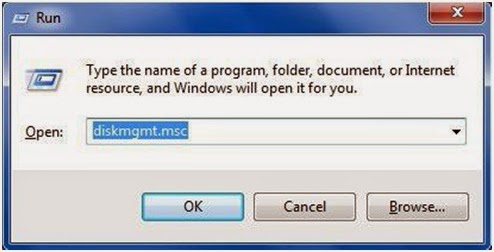
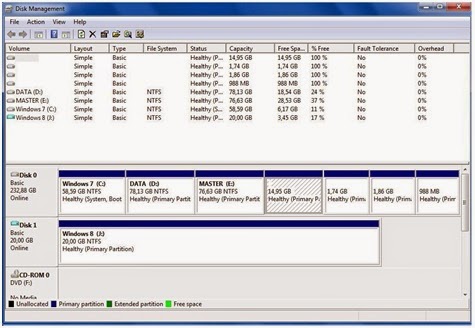
Pertama bukalah Disk Management.
Jalankan run dan ketikkan diskmgmt.msc
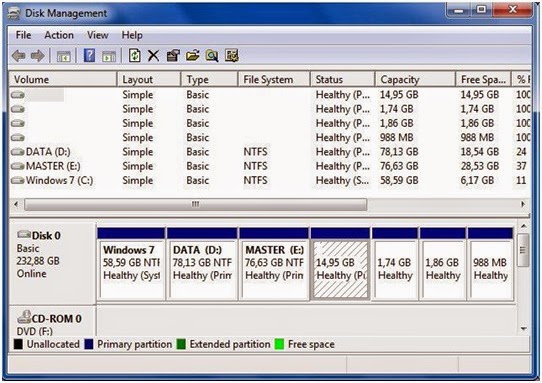
Pada Disk Management, terdapat
daftar partisi hardisk yang terdeteksi
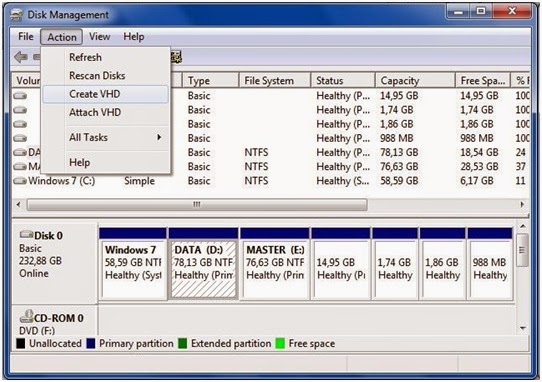
Buat VHD dengan cara pilih menu
Action-Create VHD
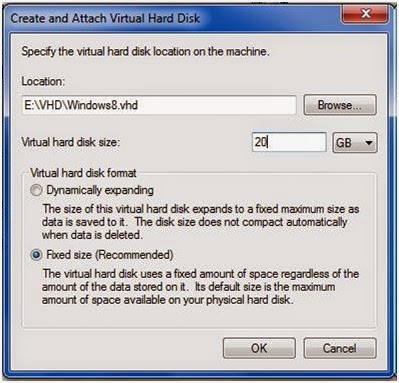
Isikan lokasi penyimpanan file VHD.
Ingat, ukuran minimal untuk menginstal Windows 8 sebesar 20 GB. Setelah itu
klik OK. Tunggu sampai selesai, proses pembuatan VHD ini membutuhkan waktu agak
lama. Indikatornya terletak pada bagian bawah layar.
File yang terbentuk adalah
sebagai berikut :

Jika sudah selesai, tutup Disk
Management dan kemudian buka kembali. Jika ada konfirmasi, pilih pilihan MBR
(Master Boot Record) dan biarkan tanda centang. Partisi baru telah terbentuk.
Jika sudah, klik kanan pada partisi baru. Pilih New Simple Volume, pilih Format
this Volume with the following settings. Jangan lupa file systemnya NTFS dan
berilabel. Tampilannya akan menjadi seperti berikut :
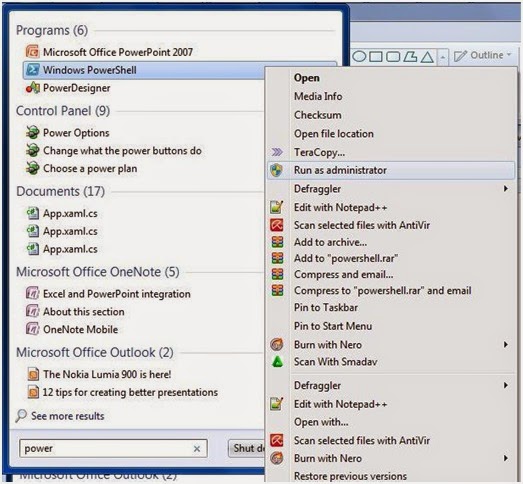
Langkah berikutnya adalah
menggunakan Powershell, jalankan powershell dengan pilihan
“run as administrator”.
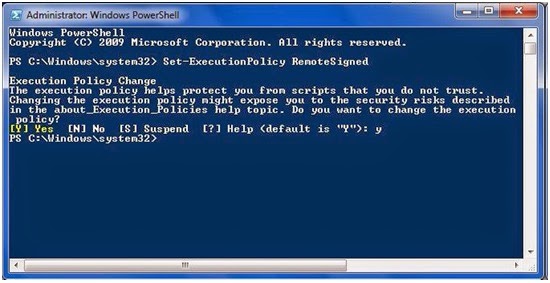
Ketikkan “Set-ExecutionPolicy
RemoteSigned” setelah itu tekan enter. Saat ada konfirmasi,
ketikkan “y”.
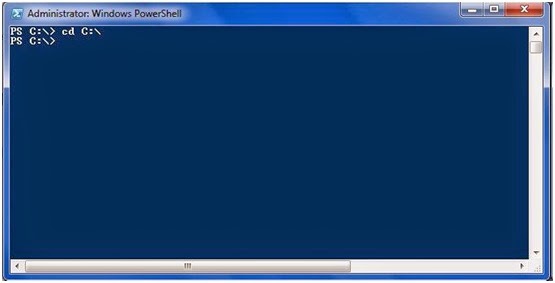
Copykan file
Install-WindowsImage.ps1 yang sudah didownload di direkto C:\. Pindah direktori
pada C:\
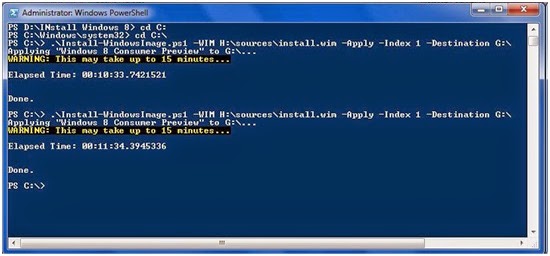
Ketikkan perintah berikut
.\Install-WindowsImage.ps1
-WIM H:\sources\install.wim -Apply -Index 1 -Destination G:\
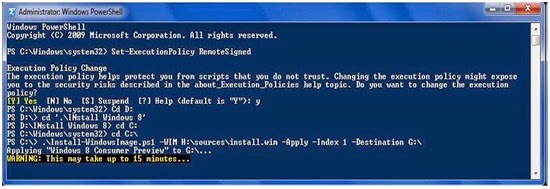
Tunggu sampai selesai.
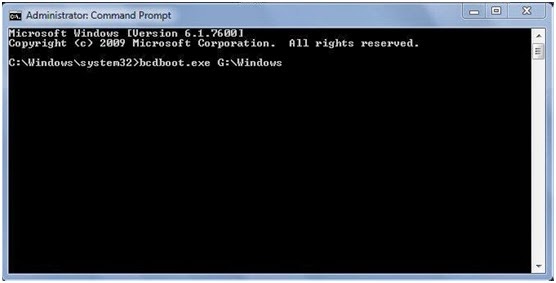
Jalankan command-prompt dengan
akses administrator. Ketikkan bcdboot.exe G:\Windows
Kemudian reboot komputer, dan
akan muncul OS Choosing screen.
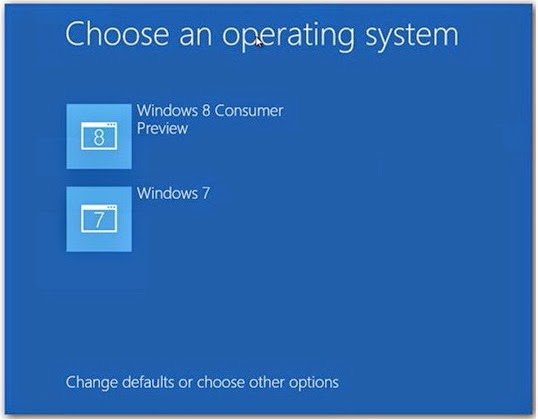
Pilih Windows 8, dan tunggu
hingga instalasi selesai. Pada tahap ini, Windows 8 akan menyesuaikan dengan
driver yang terinstal pada sistem. Sekedar info, percobaan ini saya lakukan
pada Desktop Komputer Biostar TA880GB+ dengan prosesor AMD Phenom(tm) II x4 B55, memori 2048MB, DirectX 11 dan sistem operasi
Windows 7 Ultimate 64bit


