Introduction
This tutorial will assist you in
writing your first 8051 Assembly language program using the popular Keil Compiler.
Keil offers an evaluation package that will allow the assembly and debugging of
files 2K or less. This package is freely available at their web site. Keil’s
website address is www.keil.com.
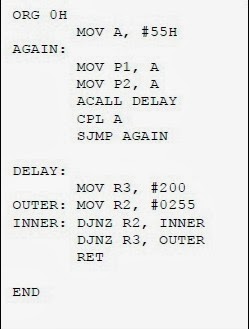
The sample program included in
the tutorial toggles Ports 1 and 2 on the 8051. The compiled program has been tested using the 8051
board from MicroDigitalEd.com. The program also works with other systems that have
Port 1 and 2 available.
Basic Keil Tutorial
1. Open Keil from the Start menu
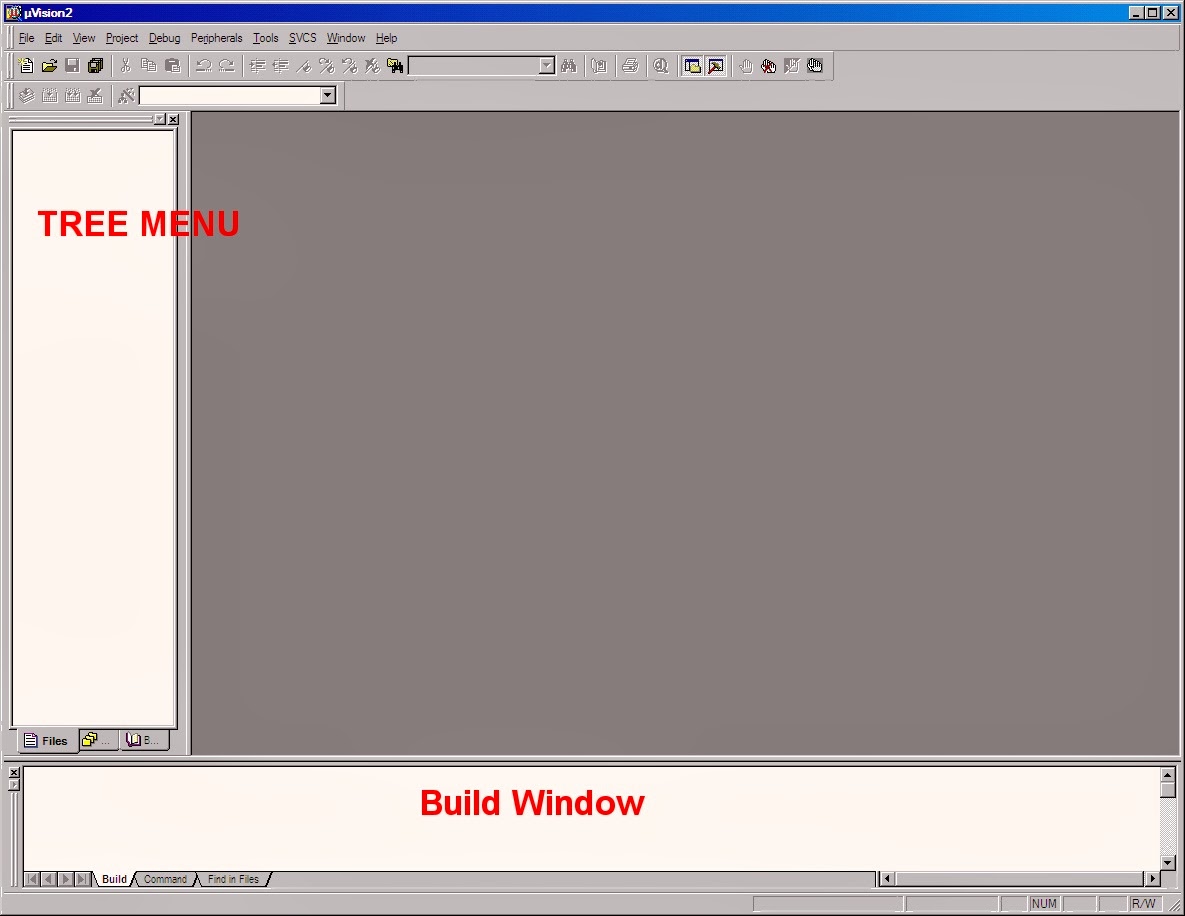
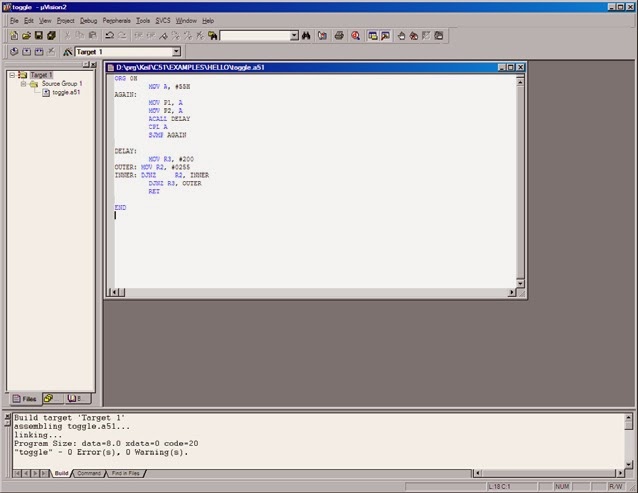
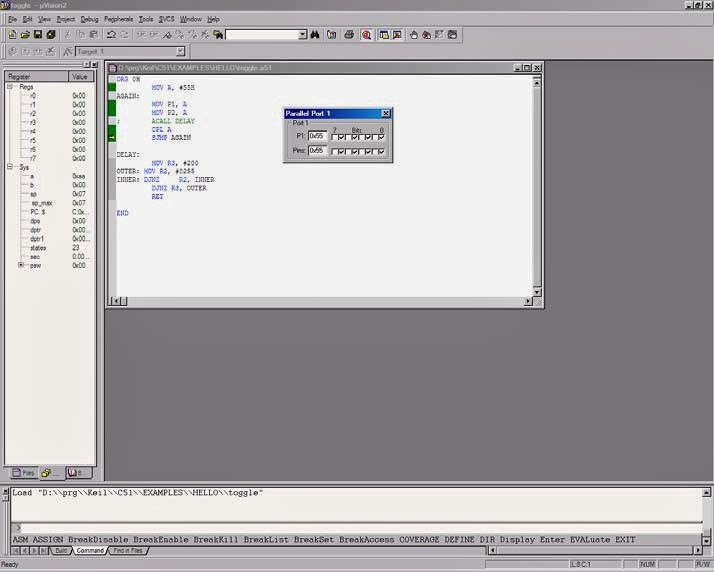
2. The
Figure below shows the basic names of the windows referred in this document
Starting a new
Assembler Project
1.Select New Project from the Project Menu.
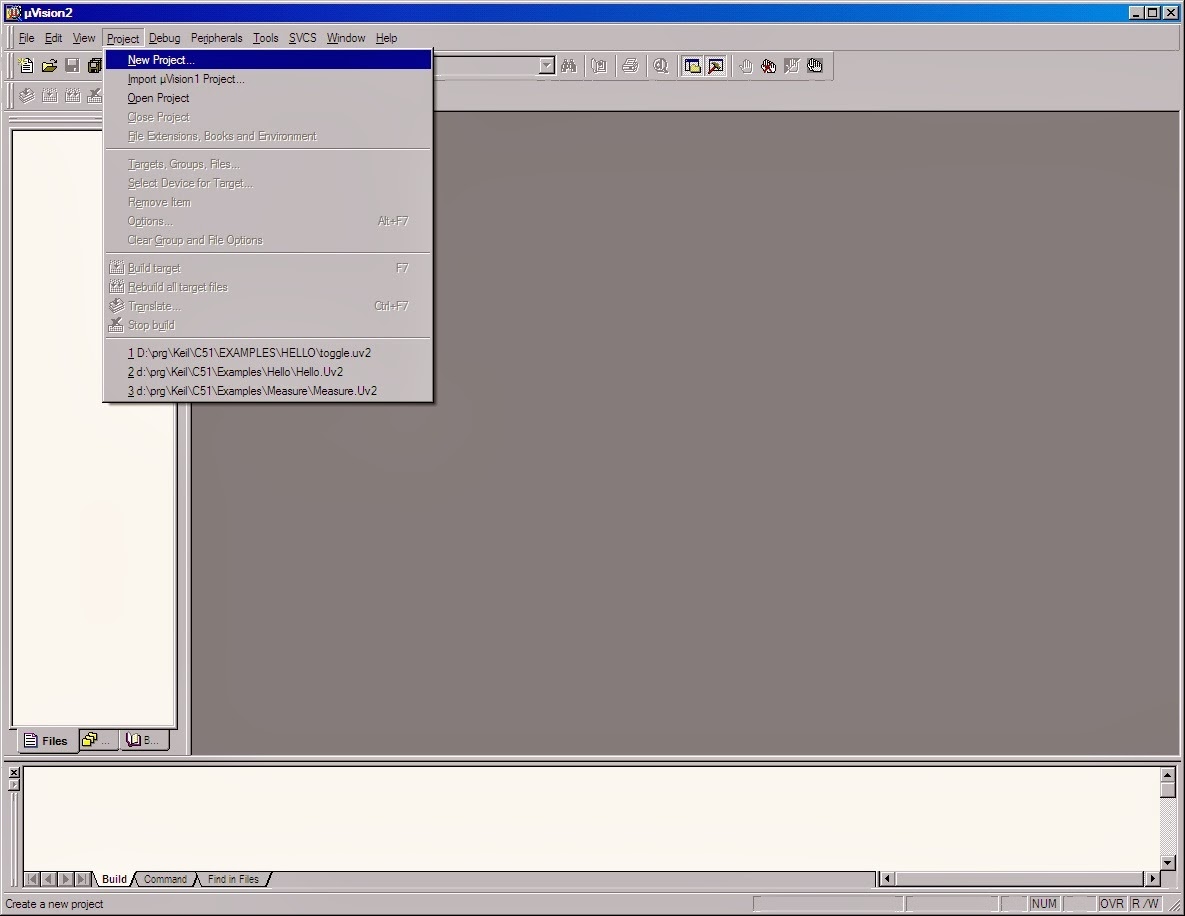
2.
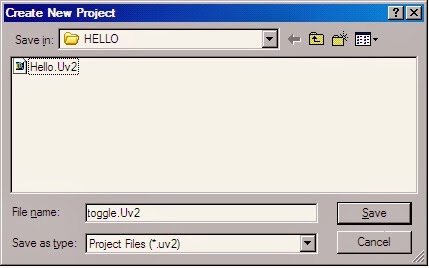
Name the project ‘Toggle.a51’
3. Click on the Save Button.
4.
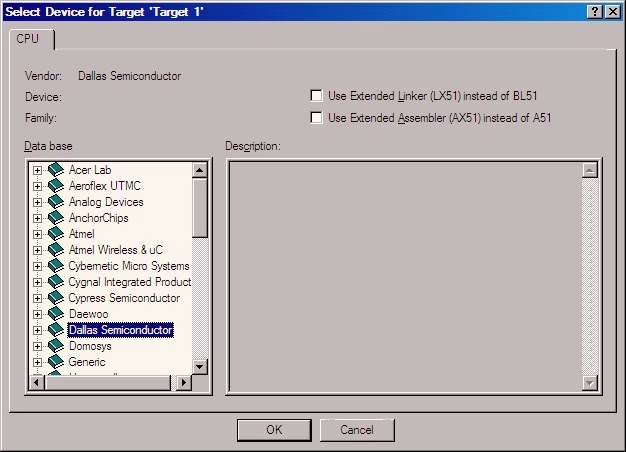
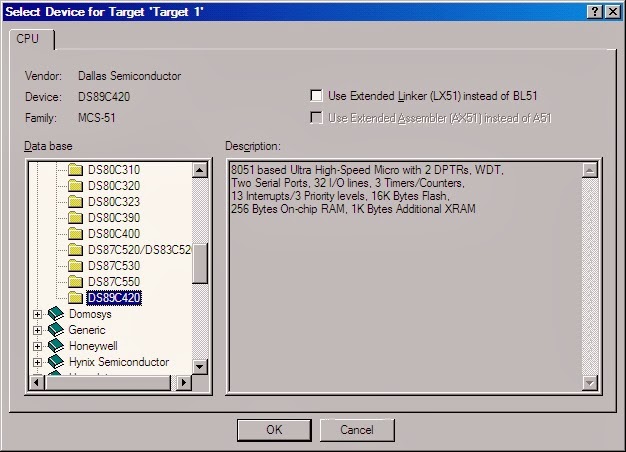
The device window will be displayed.
5.
Select the part you will be using to test with. For now we will use the Dallas Semiconductor
part
DS89C420.
6. Double Click on the Dallas Semiconductor.
7.
Scroll down and select the DS89C420 Part
8. Click OK
Creating Source File
1.Click
File Menu and select New
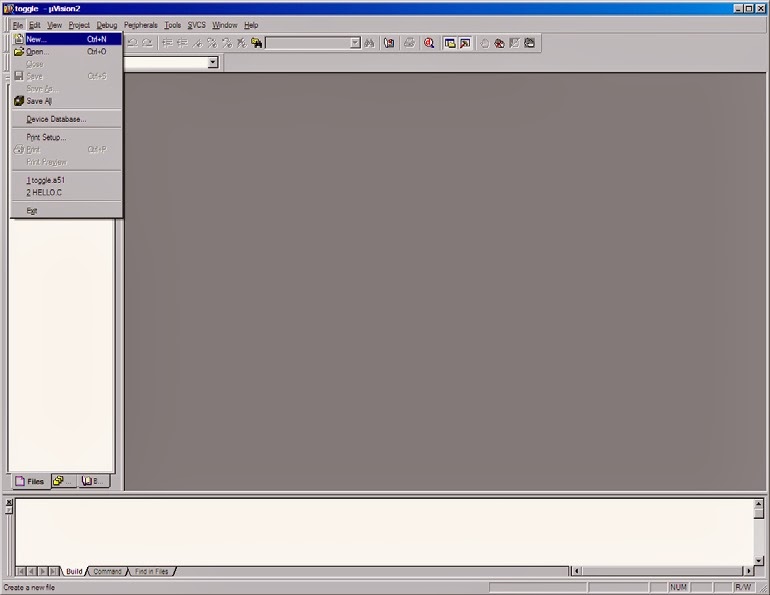
2.
A new window will open up in the Keil IDE.
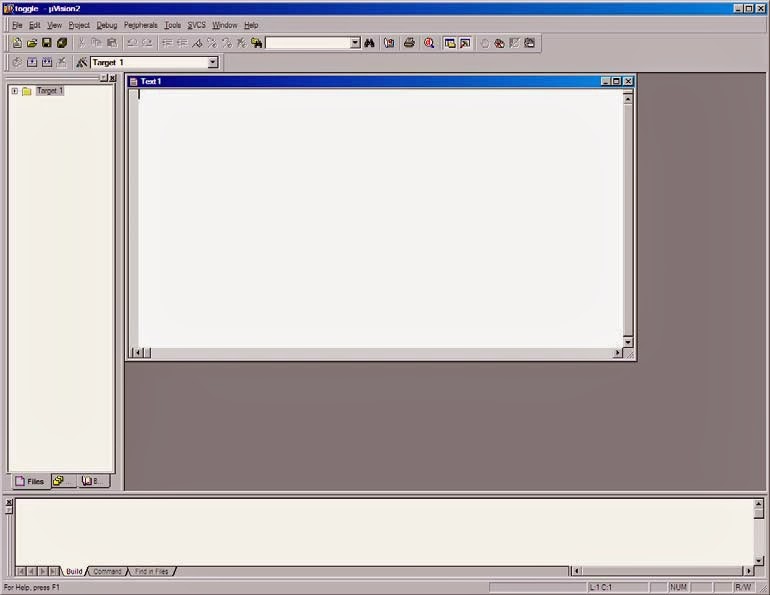
3.
Copy the example to the Right into the new window. This file will toggle Ports
1 and 2 with a
delay.
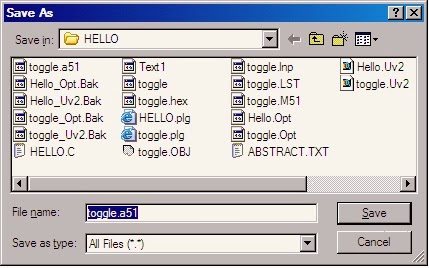
4.
Click on File menu and select Save As…
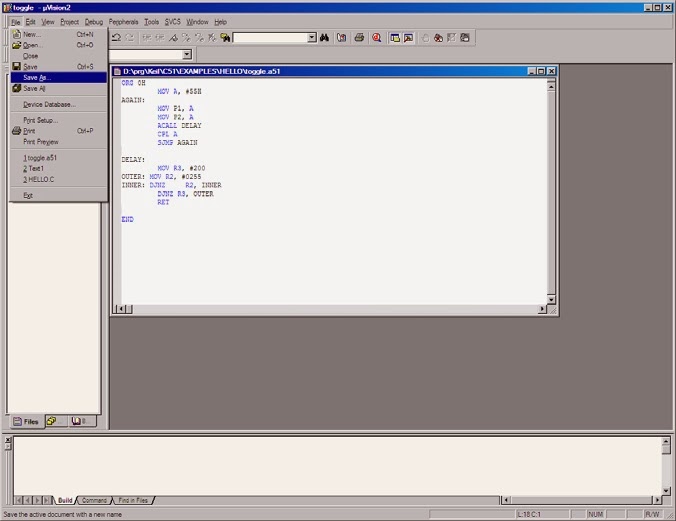
5.
Name the file Toggle.a51
6.
Click the Save Button
Adding
File to the Project
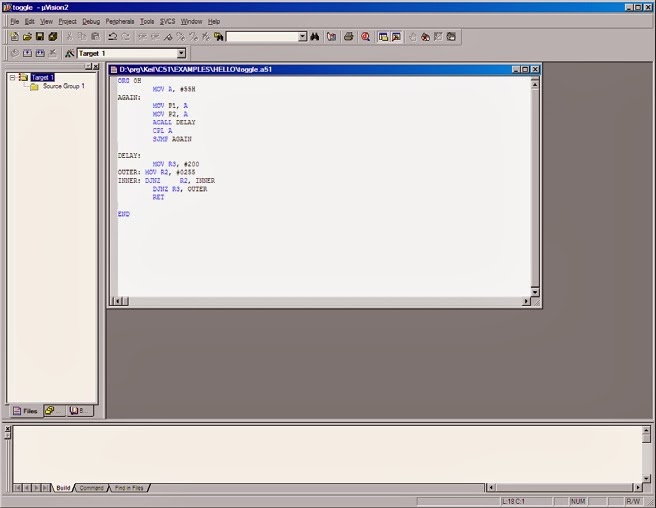
1.
Expand Target 1 in the Tree Menu
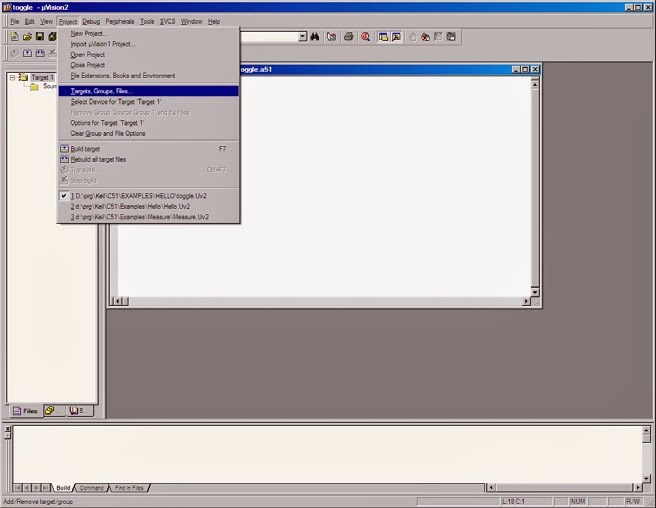
2.
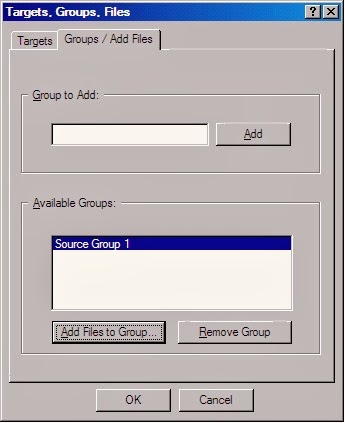
Click on Project and select Targets, Groups, Files…
3.
Click on Groups/Add Files tab
4.
Under Available Groups select Source Group 1
5.
Click Add Files to Group… button
6.
Change file type to Asm Source file(*.a*; *.src)
7.
Click on toggle.a51
8.
Click Add button
9.
Click Close Button
10.
Click OK button when you return to Target, Groups, Files… dialog box

11.
Expand the Source Group 1 in the Tree menu to ensure that the file was added to
the project

Creating
HEX for the Part
1.
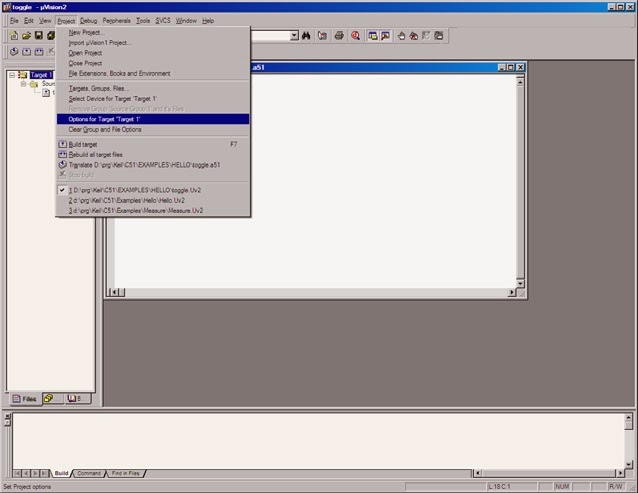
Click on Target 1 in Tree menu
2.
Click on Project Menu and select Options for Target 1
3.
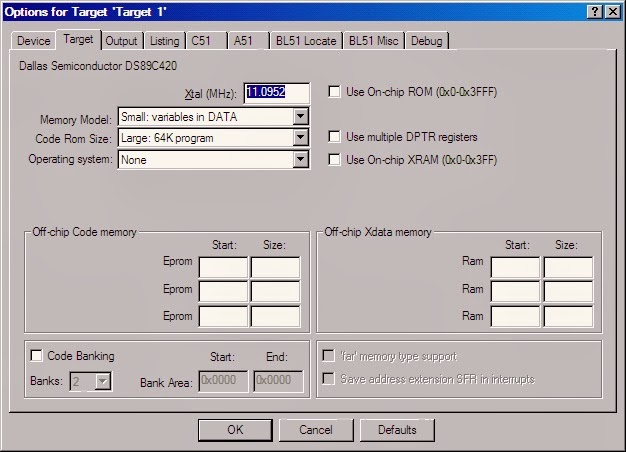
Select Target Tab
4.
Change Xtal (Mhz) from 50.0 to 11.0592
5.
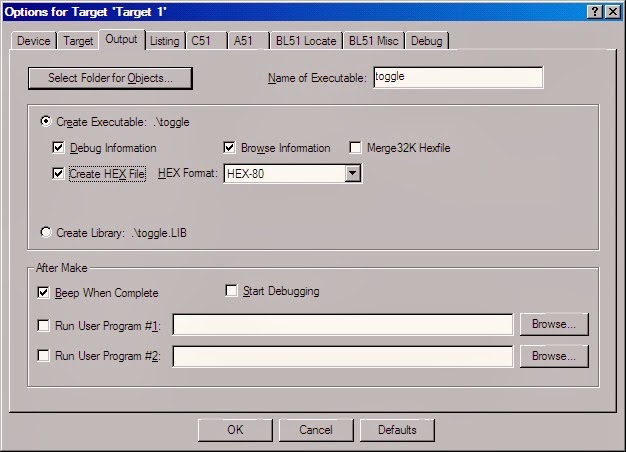
Select Output Tab
6.
Click on Create Hex File check box
7. Click OK
Button
8.
Click on Project Menu and select Rebuild all Target Files
9.
In the Build Window it should report ‘0 Errors (s), 0 Warnings’
10.
You are now ready to Program your Part
Testing Program in Debugger
1.
Comment out line ACALL DELAY by placing a Semicolon at the beginning. This will
allow you to
see the port change immediately.
2.
Click on the File Menu and select Save
5.
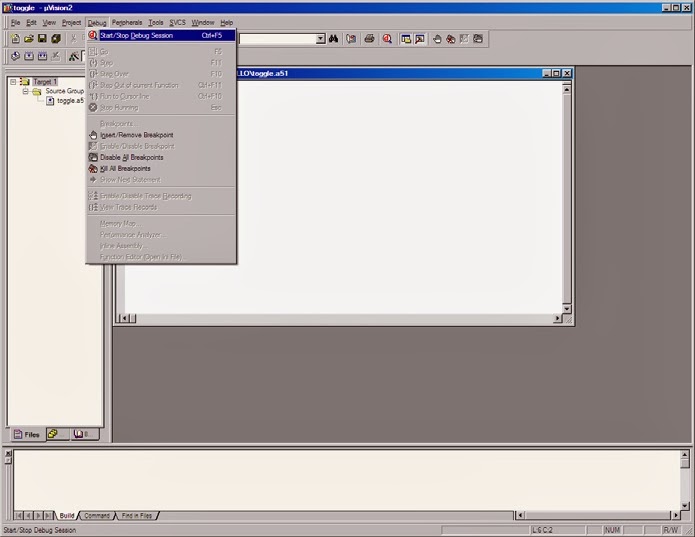
Click on Debug Menu and Select Start/Stop Debug Session

3.
Click on Project Menu and select Rebuild all Target Files
4. In the
Build Window it should report ‘0 Errors (s), 0 Warnings’
5.
Click on Debug Menu and Select Start/Stop Debug Session
Running the Keil Debugger
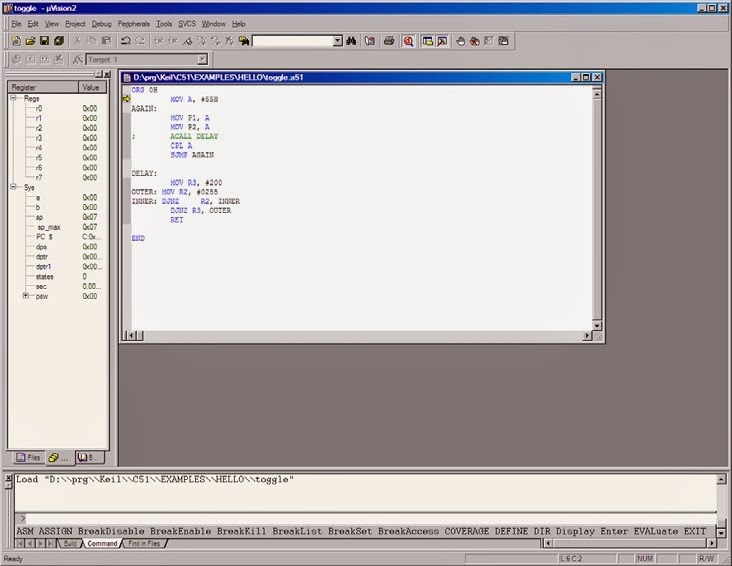
1.
The Keil Debugger should be now be Running.
2.
Click on Peripherals. Select I/O Ports, Select Port 1
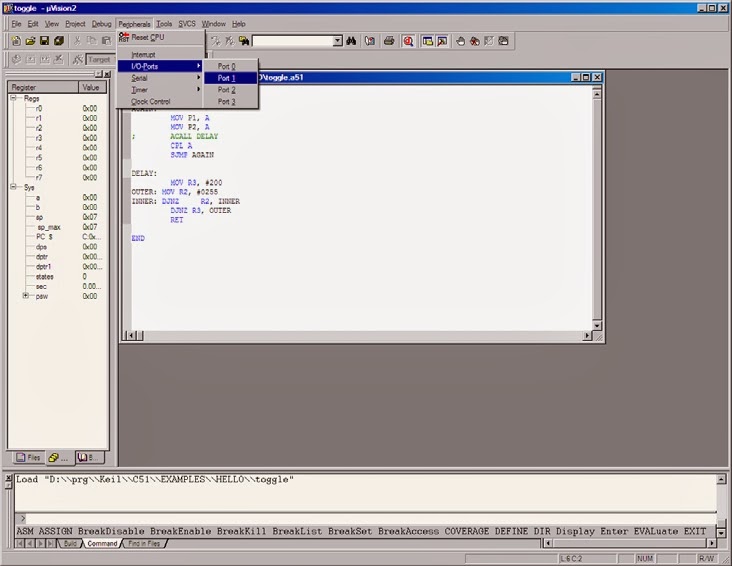
3.
A new window should port will pop up. This represent the Port and Pins
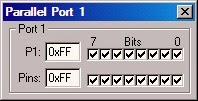
4.Step through the code bypressing F11 on
theKeyboard. The ParallelPort 1 Box should change as
you completely stepthrough the code.
5. To exit
out, Click on Debug Menu and Select Start/Stop Debug Session